В версии MSBuild MSBuild 15.0 представлена новая концепция «пакет SDK проекта», которая упрощает применение пакетов разработки программного обеспечения, требующих импортировать свойства и целевые объекты. MSBuild MSBuild 15.0 introduced the concept of the «project SDK», which simplifies using software development kits that require properties and targets to be imported.
На этапе оценки проекта MSBuild MSBuild добавляет неявные директивы импорта в начале и конце кода проекта: During evaluation of the project, MSBuild MSBuild adds implicit imports at the top and bottom of your project:
Ссылка на пакет SDK проекта Reference a project SDK
Есть три разных способа указать ссылку на пакет SDK проекта: There are three ways to reference a project SDK:
Используйте атрибут Sdk в элементе
. Use the Sdk attribute on the
При этом в начале и конце кода проекта добавляются неявные директивы импорта, как описано выше. An implicit import is added to the top and bottom of the project as discussed above.
Чтобы указать определенную версию пакета SDK, ее можно добавить в атрибут Sdk . To specify a specific version of the SDK you may append it to the Sdk attribute:
Сейчас это единственный способ добавить ссылку на пакет SDK для проекта в Visual Studio для Mac. This is currently the only supported way to reference a project SDK in Visual Studio for Mac.
Используйте элемент верхнего уровня. Use the top-level element:
При этом в начале и конце кода проекта добавляются неявные директивы импорта, как описано выше. An implicit import is added to the top and bottom of the project as discussed above. Атрибут Version не является обязательным. The Version attribute is not required.
Используйте элемент в любом месте кода проекта. Use the element anywhere in your project:
Явное включение директив импорта позволяет самостоятельно контролировать порядок добавления элементов. Explicitly including the imports in your project allows you full control over the order.
Если вы используете элемент , можно указать необязательный атрибут Version . When using the element, you can specify an optional Version attribute as well. Например, так: . For example, you can specify .
Как разрешаются ссылки на пакеты SDK проекта How project SDKs are resolved
При оценке директив импорта MSBuild MSBuild динамически разрешает путь к пакету SDK проекта, используя указанные значения имени и версии. When evaluating the import, MSBuild MSBuild dynamically resolves the path to the project SDK based on the name and version you specified. Также MSBuild MSBuild использует список зарегистрированных распознавателей SDK. Это подключаемые модули, которые отвечают за расположение пакетов SDK на компьютере. MSBuild MSBuild also has a list of registered SDK resolvers which are plug-ins that locate project SDKs on your machine. Далее следует список этих подключаемых модулей. These plug-ins include:
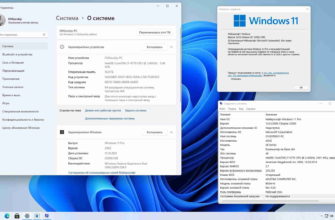
C:WebAppWebApp.csproj : error : The SDK ‘Microsoft.NET.Sdk.Web’ specified could not be found. C:WebAppWebApp.csproj
I am trying to open Dotnet core project and I am getting the above error.
I have checked the path for dotnet cmd and it works fine.
Am I missing something? Let me know if you need more information.
The target framework is set to .NET 4.5.2
12 Answers 12
I stumbled upon this issue a number of times recently. Here’s a brief list of the workaround I found (one of them always worked until now):
- Install the right .NET Core SDK: Either the latest version or the version required by your project.
- Clean-up obsolete .NET Core versions: Go to Control Panel and uninstall previous .NET Core SDK/Runtime versions (as long as you don’t use them anymore).
Create a Global.json file: Add a new global.json file to your project’s root with the following content (replace the .NET Core version build with the one you want to run the project with):
Rename the SDK reference: Open your .proj file and replace
Add the MSBuildSDKsPath Environment Variable: The dotnet CLI sets the MSBuildSDKsPath environment variable when invoking MSBuild: however, a December 2016 patch changed the CLI behaviour so that it will respect an existing environment variable, if it has already been set: this will allow the developer to “force” the CLI to use a specific SDK.
For additional info regarding the issue and other viable fixes check out this blog post that I wrote on this topic.

Dealing with .NET Core projects in Visual Studio can be tricky, expecially if you’ve installed multiple versions of the SDK and Runtime in your development environment. Among the many issues you can stumble upon, there are the following ones:
“Microsoft.NET.Sdk.Web” specified could not be found
The above error messages will most likely be shown within a pop-up error message that will appear as soon as you try to load/reload a .NET Core project contained in a Visual Studio 2017 solution:

There are a number of causes that could cause this, the most common ones being the following:
- You copied, download or GIT-cloned a project from one computer to another.
- You opened a .NET Core solution file created with a previous version/build of Visual Studio or before updating your local Visual Studio installation.
- You installed a newer version of the .NET Core Runtime and/or SDK (or uninstalled a previous one).
- You messed up with your PATH environment variable(s)
Luckily enough, there are a number of things that can be done to fix that problem for good: let’s see what can we do.
Install the right .NET Core SDK
The first thing to do is to be sure that the right .NET Core SDK and/or Runtime are installed on your system: the most recent builds and versions can be found on the official .NET Core downloads page.
Notice that the .NET Core Runtime alone is only needed if you want to be able to run the executable only: if you require to actively build the production using VS2017 you will need to get the SDK, which does also include the Runtime. Also, if you’re looking to run a specific project developed and built with a specific version of the SDK/Runtime, be sure to get and install it: conversely, if you’re doing that for your own solutions, getting the latest version is highly recommended – you will patch your local project files accordingly.
As soon as you’ve installed the required (or latest) .NET Core SDK and/or Runtime, try to launch your solution file again and see if the issue is gone before proceeding.
Clean-up obsolete .NET Core versions
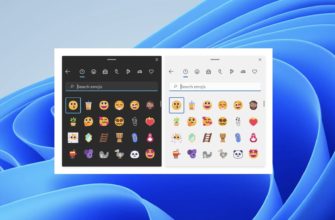
Having multiple .NET Core Runtimes, SDK and Tooling sets installed might prevent Visual Studio from working properly for a number of reasons: wrong paths, outdated references/project/solution files, and so on. To prevent these kind of issues, you should always be sure to uninstall the .NET Core versions/builds which you don’t require anymore from your development machine.
The best way to do that is to use the good old Control Panel > Programs and Features panel (or Uninstall a Program if your Control Panel is in the category view). If you’re a .NET Core developer from day-one there’s a good chance that it will require some time, as there will be a considerable amount of entries you’ll want to get rid of:

It’s worth noting that you should only uninstall the SDK and Runtime versions/builds you’re sure you don’t need anymore. If you’re a .NET Core developer, there’s a good chance that you might want to keep multiple SDK on your machine to be able to run/compile different projects/solutions… Just be sure to get rid of anything that you’re sure you don’t need anymore, as that will greatly help Visual Studio – and your environment’s .NET Core versioning system in general.
IMPORTANT: While looking at the installed versions/builds, it’s worth checking that you don’t have a runtime conflict between the 32-bit Runtime and the 64-bit SDK or vice-versa: if that’s the case, try to uninstall one of them as explained above, or install the same SDK version for 32-bit and 64-bit.
As soon as you’ve uninstalled everything you need to, check again your solution file again: if the original issue is still there, hop on to the next step(s).